
Your espresso machine is hissing, the pitcher is getting hot, and the milk is turning into either a thin liquid covered in bubbles or a stiff foam cap. It is a familiar early experience with a semi-automatic espresso machine: producing steam and creating good milk texture are separate skills.
Successful steaming depends on the milk you choose, how you introduce air and how you circulate the liquid afterward. Once those pieces come together, you can make smooth milk for lattes and cappuccinos without a commercial machine.
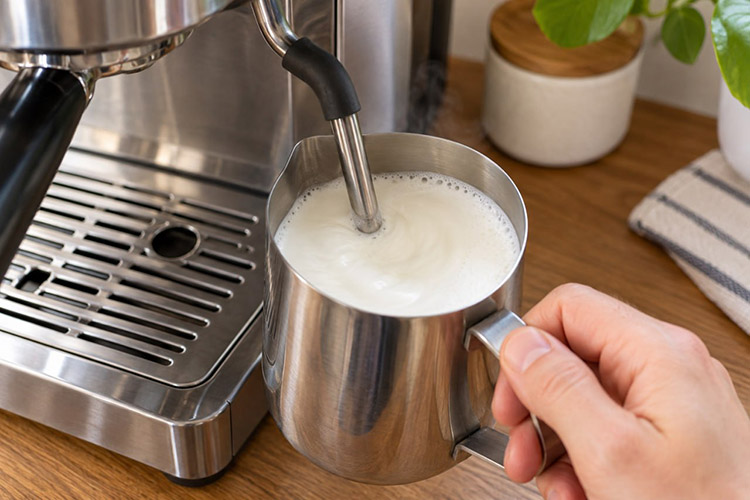
What Properly Steamed Milk Looks Like
For a latte, aim for microfoam: very small bubbles distributed evenly throughout the milk. The surface should look glossy, and the contents should move as one fluid mixture when you swirl the pitcher. Think of the consistency of wet paint.
A cappuccino generally calls for more air, but the foam should still be fine and moist. A large volume of stiff foam can look impressive while mixing poorly with espresso.
A steam wand heats and textures milk at the same time. Your job is to add enough air early, then use circulation to distribute the bubbles throughout the liquid.
What You Need
- An espresso machine with a manual steam wand.
- A clean metal milk pitcher with a pouring spout.
- Milk straight from the refrigerator.
- A milk thermometer, especially while learning.
- A separate clean, damp cloth for the wand.
A useful practice setup is 150–200 ml of milk in a roughly 350–450 ml pitcher, provided that quantity suits your machine. You need enough milk to cover the steam holes in their working position, with room for expansion and circulation. Pitcher shape and steam-tip design matter as well as capacity.
This guide covers a conventional manual wand. A Panarello attachment draws in extra air through a separate opening, so positioning and foam control can work differently. Follow your machine’s instructions for that attachment.
How to Froth Milk with a Steam Wand: Step by Step
1. Get the Steam Ready
Switch the machine to steam mode and wait until it is ready. Some home machines need time to heat up after brewing espresso.
Point the wand into the drip tray and briefly release steam to clear condensation. Close the valve again. Otherwise, the initial water can end up diluting your milk. Keep your hands clear of the steam jet and hot metal tip.
2. Position the Pitcher
Pour cold milk into the pitcher. Place the tip slightly off-center, near the surface, with the steam holes submerged. Tilt the pitcher a little so the jets encourage the milk to turn rather than simply push downward.
There is no single angle that works for every wand. The number and direction of the steam holes vary. Look for controlled movement without splashing rather than trying to reproduce an exact angle.
3. Introduce Air
Open the steam control to the working position recommended for your machine. Lower the pitcher slightly until the tip sits close to the milk-air boundary. Listen for a gentle intermittent hiss, sometimes compared to paper tearing.
Loud gulping and splashing mean the steam holes are too exposed. Raise the pitcher a little to submerge them further. If the milk gets hotter without expanding, the tip is probably too deep.
For a latte, begin with a modest volume increase of around 15–25%. For a more aerated cappuccino, try roughly 30–50%. These are practice starting points, not fixed drink definitions. A powerful wand introduces air quickly; a gentler home machine takes longer. Watch the milk and listen rather than using a universal number of seconds.
4. Switch to Texturing
Once you have enough air, raise the pitcher slightly so the tip sits deeper beneath the surface. Active air intake should stop. Keep the milk rolling or turning so the foam blends into the liquid underneath.
Try to finish most aeration while the milk is still cool or only slightly warm. Adding a large amount of air at the end leaves little time to incorporate the resulting bubbles before the milk reaches its target temperature.
5. Stop Before Overheating
A useful starting target for dairy milk is a final temperature of around 55–65°C, or 131–149°F. Try the upper end if you prefer a warmer drink, while checking that you still enjoy the flavour. Extra heat can come at the expense of taste and texture.
Thermometer lag may mean the reading rises slightly after you turn off the steam. Learn how your particular setup responds. Do not use a painfully hot pitcher as a precise temperature test.
Turn the steam fully off before removing the wand from the milk to avoid splashing.
6. Clean the Wand and Pour Promptly
Immediately wipe the wand with its dedicated damp cloth, then briefly purge it into the drip tray. Milk residue is much harder to remove once it dries. Follow the machine manual for periodic cleaning of the tip.
If a few large bubbles remain, give the pitcher a gentle tap on a stable surface, then swirl it. Tapping can remove isolated bubbles; it cannot undo excessive aeration.
Pour into your espresso promptly. As steamed milk stands, the foam gradually separates from the liquid. You do not need latte art to make a good drink: consistent texture comes first.
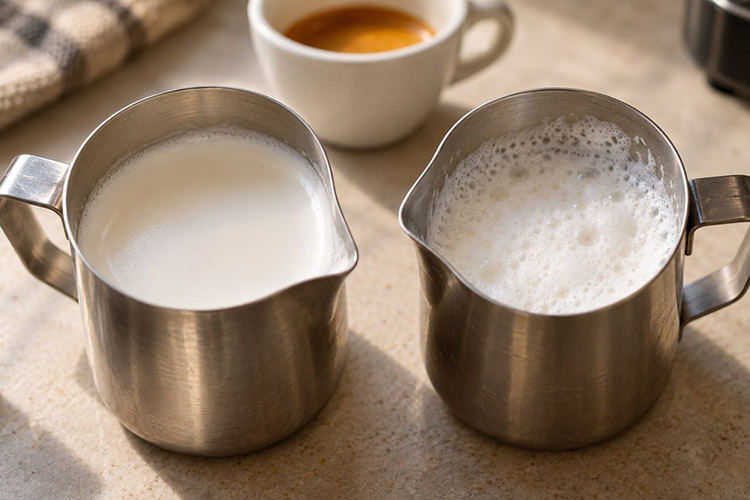
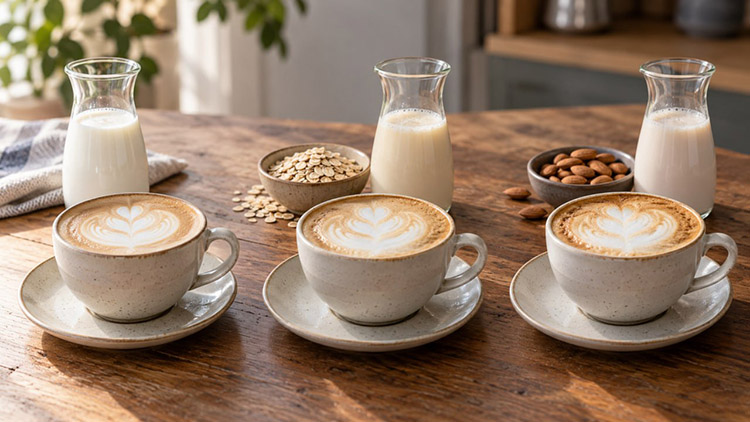
Which Milk Froths Best?
There is no winner for every drink and every preference. Proteins help form and support foam, fat contributes to richness, and the overall formulation and processing affect how the milk behaves when heated.
Whole dairy milk, around 3–3.5% fat | Creamy flavour and balanced texture | A convenient starting point for lattes and cappuccinos |
Reduced-fat dairy milk | A lighter mouthfeel; foam may be more voluminous | Drinks with less richness |
Lactose-free dairy milk | Often textures well and usually tastes sweeter | A dairy option without lactose |
Barista oat milk | Often produces fluid foam with a mild cereal flavour | A practical first plant-based option |
Barista almond milk | Nutty flavour; texture varies considerably by formulation | Coffee drinkers who enjoy almond flavour |
Lactose-free dairy milk still contains milk proteins and is not an alternative for someone allergic to those proteins. UHT treatment does not automatically make milk unsuitable for steaming either. Compare individual products rather than judging only by “fresh” or “UHT” on the carton.
How to Froth Oat Milk with a Steam Wand
Start with an oat drink labelled Barista. These formulations are designed with heating, texturing and mixing with coffee in mind. An ordinary oat drink may foam too, but the outcome is less predictable.
Refrigerate the carton and shake it before pouring, following the manufacturer’s directions. Begin with restrained aeration: too much air can turn a fluid texture into a thick foam layer. Then maintain circulation and pour soon after steaming.
If the carton gives no temperature guidance, try a final temperature of 55–60°C, or 131–140°F, as an initial experiment. Assess the flavour and stability. This is not a universal limit; some formulations are designed for different conditions. Two brands can produce different foam even with the same technique.
How to Froth Almond Milk with a Steam Wand
Almond drinks vary substantially in composition. A standard version intended for cereal may produce large bubbles or separate quickly. A Barista formulation is usually an easier place to begin for coffee.
Use it cold, shake the carton and introduce air gradually. Switch to circulation after a modest increase in volume. Around 55–60°C, or 131–140°F, is a practical starting range unless the manufacturer advises otherwise. For example, Almond Breeze recommends 60°C for its Barista Blend.
If the drink looks smooth in the pitcher but forms flakes in the cup, temperature, coffee acidity and the almond drink’s formulation may be interacting. Try a lower steaming temperature or another Barista product. Further frothing will not repair a drink that has already curdled.
Common Milk-Steaming Problems
If your machine has consistently gentle steam, try a smaller portion in a suitably sized pitcher. This can reduce prolonged heating, but it cannot fully compensate for inadequate steam power or a blocked tip.
Large bubbles | Tip too high; air entering in bursts | Submerge the holes slightly more and steady the pitcher |
Hot milk with little foam | Tip too deep from the start | Introduce air near the surface early in the process |
A dry cap above thin milk | Too much air or insufficient circulation | Shorten aeration, then improve the rolling motion |
A sharp screech | Unhelpful tip depth or position | Adjust the depth and off-center placement slightly |
Milk heats too quickly | Portion too small or milk too warm initially | Use cold milk and a quantity suited to the pitcher |
Steam weaker than usual | Machine not ready or tip dirty | Wait for readiness and clean according to the manual |
Frequently Asked Questions
Can You Steam Milk Twice?
Measure a fresh cold portion for each drink. Reheating makes flavour and texture less predictable. Avoid topping up leftover warm milk with cold milk for another steaming cycle, and do not return leftovers to the carton.
Do You Need a Thermometer?
It is useful while learning because it shows how much time you have for aeration and when to stop steaming. Feeling the pitcher gives only a rough sense of warmth, not an accurate temperature.
Why Is Latte Art Difficult Even When There Is Foam?
Latte art needs fluid, integrated milk. If the foam pours out as a separate lump, introduce less air and improve circulation. Then work on pouring height and flow rate.
What Is the Fastest Way to Improve?
Keep the milk, portion size and pitcher consistent for several attempts. Change one variable at a time: tip depth, aeration time or final temperature. That makes it easier to identify which adjustment helped.
